Every now and then, I look for a new endeavor to tackle regarding natural and organic products, whether they be household products, hygiene practices, or all things edible. My latest experiment was in making my own deodorant. A friend recently suggested an awesome blog to me: Simple Mom. I won’t go into great detail, as these ideas and creations are not mine and you can explore her website yourself…but I had to pass it on. In the “green and frugal†section of the website, this mom details explorations into more natural ways of caring for her family, herself, and her home. The post I found was a guest post about deodorants and antiperspirants, how antiperspirants are unnecessary and potentially harmful, and how you too can make your own deodorant. So, I did! And guess what? It works. I’m still figuring out how much to use and the best method of application, but I am very happy with it. Thank you, fellow bloggers, and happy deodorizing!
3 Jan
Abbreviated Creations
Here are some photos and short descriptions of my latest culinary creations of note:
Homemade Strawberry Jam:
I did not follow a recipe, which is very characteristic of my cooking… Lesson learned? Follow a recipe. Made-up strawberry jam turned out more like made-up strawberry disgustingness. I won’t even grace it with pictures because it just looked like pink goo.
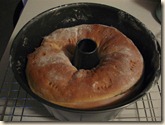
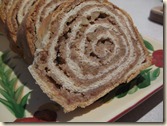
Potica:
Pronounced "puteetza," a traditional nut roll that my husband’s ancestors prepare for Christmas and special occasions…and now I carry on the tradition as well.
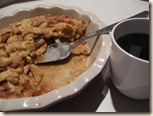
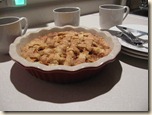
Homemade Apple Pie:
…with traditional lattice-top crust, of course.
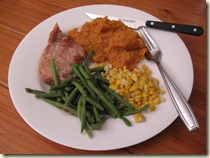
Feast of Seasonal Fall Foods:
Sweet, cinnamon pork chops, mashed sweet potatoes, green beans, and corn. Mmmm! This is one of the more colorful meals I have cooked.
3 Jan
Nature Prints
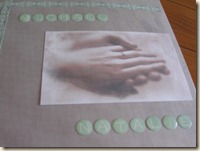
Due to the beautiful leaves this past fall, I wanted to get creative and somehow transfer nature’s beauty onto something that would remain, even after the leaves fell and withered. So I took a walk, collecting fallen leaves and berries as I went. At home, I took out my cutting board and laid some muslin fabric on it. From there, I placed leaves on the fabric, took a hammer and gently pounded the “juices” out of the leaves, leaving “prints” on the fabric. After experimenting for a while (with some success and some failures), I cut out the good prints and sewed them onto parchment paper to make a set of cards. They could be used as greeting cards, thank yous, birthday cards, or for decoration! I gifted them to my sister-in-law for Christmas, receiving a lovely smile and thank you in return.
Bonus: Despite many washings, my cutting board still bears the leaf prints that bled through the muslin!
24 Oct
Knit, Pearl, Scarf Success!
A few years ago at Thanksgiving, my aunt taught me how to knit. Just a simple stitch, but it spurred a series of scarves and a few blankets. Over the past two years, I have attempted several different knit and pearl combinations and patterns, but all to no avail. As simple as it may seem, I couldn’t get the hang of a knit and pearl stitch in the same row; I seemed to be missing a simple technique or step that no plethora of crafting books were able to solve. Fortunately, I was on a retreat with a friend last winter and she uncovered the secret for me: switch the string of yarn from the back to the front when going from knit to pearl! So simple, and yet it eluded me all these years. All of that to say, that with the help of my husband’s logically-wired mind (in contrast to my abstractly-wired mind), I deciphered and started a diamond pattern with some warm, green, wool yarn. The pattern consists of the following (K=knit, P=pearl):
17 stitches per row
Row 1: K4, P1, K7, P1, K4
Row 2: P3, K1, P1, K1, P5, K1, P1, K1, P3
Row 3: K2, P1, K3, P1, K3, P1, K3, P1, K2
Row 4: P1, K1, P5, K1, P1, K1, P5, K1, P1
Row 5: P1, K7, P1, K7, P1
Row 6: P1, K1, P5, K1, P1, K1, P5, K1, P1
Row 7: K2, P1, K3, P1, K3, P1, K3, P1, K2
Row 8: P3, K1, P1, K1, P5, K1, P1, K1, P3
Repeat until scarf is desired length.
The finished product? A warm, medium-width scarf that is perfect for the chilly fall and winter winds! This pattern can really be used with any yarn, but the pattern shows best with a simple, monochromatic yarn, without frills, bells, or whistles.
24 Oct
Southern-style Dinner: inspired by a picture book
About two weeks ago, I was helping out in a first grade classroom with their independent reading time. One of the students read a book to me about a family reunion. Naturally, this picture book included the traditional family food for this reunion, including an aunt’s “famous” barbecue chicken, yummy salads, and decadent chocolate cake. Thus, a picture book inspired this past Wednesday’s dinner.
I have attempted homemade, crockpot, barbecue chicken before, and it was a complete disaster. I don’t remember if I failed to follow a recipe or tried to wing it, but either way it was a disaster. Therefore, I was a little wary this time. I searched several sites for a highly-rated spicy barbecue sauce, finally happening upon Food Network’s Melt-In-Your-Mouth Barbecued Ribs recipe, courtesy of Robin Miller. I used chicken legs instead of ribs, but the result was equally delicious and successful. I doubled the recipe so I would have some extra sauce for later, tweaked the amount of vinegar and spices to create a slightly sweeter and spicier sauce, and slow-cooked the chicken legs in oodles of this tasty sauce in the crockpot for about 8 hours. The result: tender chicken that literally fell off the bone when you plucked it from the crockpot, soaked in this perfectly-seasoned sauce.
My version of Robin Miller’s Barbecue Sauce:
- 18 oz. tomato paste
- 2 cups water
- 1/3 cup molasses
- 2 Tablespoons red wine vinegar
- 2 Tablespoons Worcestershire sauce
- 1 Tablespoon reduced-sodium soy sauce
- sprinkle of salt, to taste
- 2 teaspoons ground cumin
- 2 teaspoons paprika
- 3 cloves minced garlic
- 1 teaspoon salt
- 1 Tablespoon cayenne pepper (or more, based on how on-fire you want your mouth to be)
Mix all the ingredients together, slather on the chicken legs in the crockpot, and cook on low for 6-8 hours or on high for 3-4 hours.
Finally, I set to work on the chocolate cake. I decided to try a different recipe than my last chocolate cake endeavor, settling upon my 2008 edition of Taste of Home’s Annual Recipes and Doris Jennings Fudgy Pudgy Cake. This cake is so moist and has the perfect amount of sweetness and chocolate. I used a different frosting than the glaze the recipe suggests, but here is the cake recipe:
- 1/2 cup unsweetened baking cocoa
- 1 cup hot water
- 3/4 cup butter, softened
- 2 3/4 cups packed brown sugar
- 3 eggs
- 2 1/2 cups all-purpose, unbleached flour
- 2 teaspoons baking soda
- 1 teaspoon baking powder
- 3/4 teaspoon salt
- 1 cup buttermilk
- 1 1/2 teaspoons vanilla extract
Combine cocoa and hot water until smooth; cool. In a large bowl, cream butter and brown sugar. Add eggs, one at a time, beating well after each. Combine the flour, baking soda, baking powder, and salt; add to creamed mixture, alternating with buttermilk and cooled cocoa mixture. Stir in vanilla.
Pour into three greased and cocoa-dusted cake pans. Bake at 350 for 20-25 minutes or until a toothpick comes out clean. (Tip: put an old cookie pan on the rack below the cakes, just in case they decide to overflow.) Cool for 10 minutes, then remove from cake pans to wire racks to cool completely.
Frost (outside and inbetween layers) with your favorite frosting.
I attempted to make homemade, old-fashioned buttercream frosting, but it was not a successful experience. I found a recipe on Food Network that uses a meringue base for the buttercream. I’m not sure if I failed to heat my sugar-water syrup to a high enough temperature (my lack of candy thermometer did not help) or if my meringue wasn’t right, but the frosting did not combine correctly. It tasted delicious, but the consistency was completely off; instead of a creamy, thick, pasty-in-a-good-way frosting, I ended up with a fluffy, light, somewhat frothy frosting. The cake still tasted very good overall, but I was disappointed that the buttercream did not turn out like I expected. Next time, I will try my mother-in-law’s tried and true buttercream frosting recipe. Maybe I should have tried that in the first place…but I learn from experience, so what can I say?
In addition to the chicken legs, we had an iceberg lettuce salad (not so nutritious, but tasty nonetheless), with shredded cheddar cheese, croutons, and some ranch dressing to top it off. The ranch dressing, in my opinion, goes particularly well with the barbecue sauce.
Overall, I judge that this meal was tasty, despite the frosting failure. My husband seemed to agree, so I deem this meal a fortuitous inspiration, compliments of a child’s storybook.
24 Oct
Tradition: Homemade Applesauce
Almost every year for as long as I can remember, my mom would take my sister and me to Stuckey Farm to pick and buy apples, as well as bring home a delicious collection of dutch apple pies, real apple cider, and those delicious marshmallow caramels! The orchard experience was always a blast, but when we got home, the real work began. We would slice the apples, cook them until they were mushy, puree them using the Victorio strainer that my grandmother gifted to my mom, and finally, mix in sugar and cinnamon before storing the final deliciosity in freezer containers.
19 Aug
Pork Loin with Vinaigrette on Romaine
This is a variation on a tasty recipe I found last week in the Indianapolis Star. To my delight, pork loin was also on sale last week, so the creation of this dish was inevitable. There’s really no amusing anecdote to accompany this meal, so here it is, plain and simple:
- 1 1/4 pounds pork tenderloin, sliced 1/4″ to 1/2″ thick (most grocery stores slice it for free)
- 1-2 small shallots, minced
- 1 clove garlic, minced
- 1 Tablespoon lemon juice
- pinch of salt
- pinch of black pepper
- 1/4 to 1/2 cup olive oil, depending on preference
- 1/4 cup balsamic vinegar
- 1 head Romaine lettuce
- crumbled plain feta cheese (you decide how much!)
- 1/4 to 1/2 cup sliced almonds
- 2-3 pears, sliced (use your favorite variety)
- Preheat grill to medium. Cook tenderloin for approxiamately 20 to 25 minutes, turning periodically, until cooked to 160 degrees internally. (If using a George Foreman grill, preheat for 10 minutes, cook for a few minutes on each side.) Remove from the grill and let rest for 5-10 minutes.
- Meanwhile, saute minced shallots and garlic in the olive oil for a few minutes. Add lemon juice, balsamic vinegar, pepper, and salt. Whisk until combined. You will want to whisk this dressing again right before serving, as this combination tends to separate naturally.
- Wash, drain, and tear up lettuce while the meat rests.
- Toss lettuce, feta cheese, and almonds. Top with the sliced and grilled pork loin and vinaigrette. (The vinaigrette can be served on the side, as suggested, or mixed in with the salad.) Serve with the sliced pears. This meal can also be complimented by a semi-dry white wine, such as Tabor Hill. Bon appétit!
19 Aug
Mon Petit Jardin
When we got married and moved into our first apartment, I was so anxious and excited to start my own plants, to create mon petit jardin. I have had opportunities in the past to grow things, but this was the first time that I would be fully responsible for my little plants; mother is not here to water or weed when I forget.
I started simply:
- pots and dirt from my mother
- free packet of wildflower seeds from a Burt’s Bees promotion
- morning glory seeds from our wedding favors
- tin buckets from our wedding decorations
- my garden “catuary”/”gnome” Stella; if I can’t have a real cat now, I at least have my garden cat statue named Stella
After I gathered my materials, I donned my trusty, all-purpose, gardening gloves (which have been used for anything and everything except gardening thus far), and set to work making a dirt-y mess on our apartment balcony. My husband wisely left me to my devices, to make my own organic endeavors while he did some intelligent computer thing. After one cycle of my favorite country music mix, the seeds had been planted, the trellis was set and ready for little glory vines to climb, and Stella was proudly perched next to the mysterious wildflowers and the fragrant basil, watching over my little plantlings.
The morning glories were the first to sprout, quickly shedding their seed shells and are now climbing and winding vigorously all over the trellis, the balcony railing, and sometimes the other plants. We have yet to see them bloom, but I still have hope. The wildflowers are still a mystery…my husband says they look like weeds, and as they still have no blooms and I have no wildflower knowledge, I reluctantly allow that comment. The basil and sage that I have now added are healthy and fragrant; I use them often in my cooking, which is wonderful! (I also recently read an article that mentions basil’s wonderful stress-relieving characteristics…no wonder I love to cook with it!) Also, a friend gave me some mint from her flourishing garden variety, which nicely perfumes our balcony and flavors my tea.
My favorite part of the “garden” right now is my tomato corner. I have two tomato plants growing, one USDA organic-certified and the other commercially grown. Secretly, I want to find out which plant fares better and make my organic vs. non-organic argument to my husband then. Granted, I gave the organic plant an unfair advantage with a bigger pot and more dirt, so I guess I’ve already thrown the results. Anywho, both plants are doing fairly well, although our Indiana weather has failed us a bit for the tomatoes…word on the street is that tomatoes need the constant hot, humid weather that our fine state usually provides. On the organic plant, I currently have two actual tomatoes growing, and eight or more yellow buds holding the promise of more tomatoes! I am ridiculously excited each time I see growth on any of my plants!
While I cannot fairly say that I have grown a green thumb, I believe I am on my way. With the space, resources, and experience I have, I’d say I have achieved relative success. I had hoped for a larger variety of herbs to grown, but for now, I am content to wait with anticipation as mon petit potager du tomate et basilic grows into something that can deliciously adorn a toasty turkey sandwich.
Update: the morning glories bloomed!:
6 Aug
Becoming a REAL scrapper…
Sometimes I give myself too much credit…
Those who scrapbook spend lots of time thinking out their projects. They plan out each page carefully and creatively, utilizing souvenirs, pamphlets, precious few photographs, treasured items and so on, to create these sometimes beautiful, sometimes gaudy, but always interesting crafts through which they can look back on, remembering special times, people, places, and events. These are true “scrappers.”
Thinking myself crafty, my former use of the term “scrapbooking” was to describe my display of photos from various events in an attempt to catalog my life. Translation? I buy photo albums, stick the pictures in chronological order (mostly), and write a minimal description of the photo in the provided space beside it. This is not real scrapbooking. Actual scrapbooking requires at least the above-mentioned work and predetermination of layout. And to think I dared to call myself a scrapbooker.
So, in an attempt to conserve funds and resources, and due to the creative birthday gift from a dear friend, I decided to venture cautiously into the real world of scrapbooking. Now, I didn’t do any actual research or talk to any antiquated women from Minnesota who could be considered natural scrappers (anyone seen the movie New in Town?), but I have seen many examples of more detailed scrapping than my false attempts. Over the course of a weekend, I mauled our living and dining areas with the pages, mementos, stickers, and pictures for the scrapbook. I arranged, pondered, cut, pasted, re-pasted, and sent my husband on more than one trip to get more double-sided tape. At the end of it all, my back hurt, my vision was a bit blurry, and the apartment was a mess (which freaked me out because we were having guests for dinner soon), but the first real scrapbook was finished. And it turned out pretty well, if I do say so myself. Will I do it again? Maybe for our first child…
28 Jul
Fettuccine with peas, shallots, and herbs
This turned out to be a surprisingly tasty recipe I found in the June issue of Real Simple magazine. The original recipe is a vegetarian dish, calling for fettuccine, peas, olive oil, shallots, pecorino or Parmesan cheese, parsley, and mint. Not having an unlimited pantry, I substituted a few items (as usual) and added chicken, as my husband appreciates meat with his meals, the dear carnivore =-).
So, I substituted:
- spaghetti for fettuccine
- fewer shallots
- romano for pecorino/Parmesan
- fresh basil for parsley and mint
Obviously, these were not difficult substitutions, but they significantly change the taste of the dish. We both greatly enjoyed the dish, and my husband appreciated the addition of chicken, although it is not a necessary flavor to make the meal.
